TERMS USED BY COMPRESSOR
There are a few terms used by Compressor that you should feel comfortable with
before you begin using it.
A batch is the heart of the transcode process. It contains one or more source media
files, which are the files you want to convert, or transcode, to another format. Each
source media file creates its own job. This means that a batch can contain multiple jobs,
with each job based on its own source media file.
Each job also has at least one target. The targets define what sort of output file should be
created by the transcoding process. You can have multiple targets assigned to a job,
which means that you can easily create multiple output files, each with a different format.
Each target has three parts:
1. The setting: The setting part of a target defines the encoder format that is used, as well
as a number of other aspects, including a variety of filters and geometry attributes.
2. The destination: The destination part of a target defines where the output file is saved.
It also defines the rules that are used to create the output filename. Compressor
includes a preference setting that allows you to specify a default destination.
3. The output filename: You can edit the output filename part of the target if for some
reason you do not want to use the name generated based on the destination.
Note: You can transcode a job only after it has at least one setting assigned to it.
QUICK AND EASY COMPRESSOR WORKFLOW
If you experience trouble you may need to drag and drop one by one. Sometimes the computer cannot handle such a big load and will crash.
Click on the Apple folder > Formats > Quicktime > Apple Prores 422
I would avoid the select all jobs as outlined about, instead I would drag and drop this into each clip. It is time consuming but it prevents your computer from crashing.
You may like to create a specific folder just for your compressed files so that they are easier to find when you are ready to import them into FCP.
- In the Destinations Tab > Custom. Click on the + button top right of the window > Local > your external hard drive and specific folder.
- Do this individually again to prevent your computer from crashing.
Alternatively you can follow the instructions below as outlined in the manual.
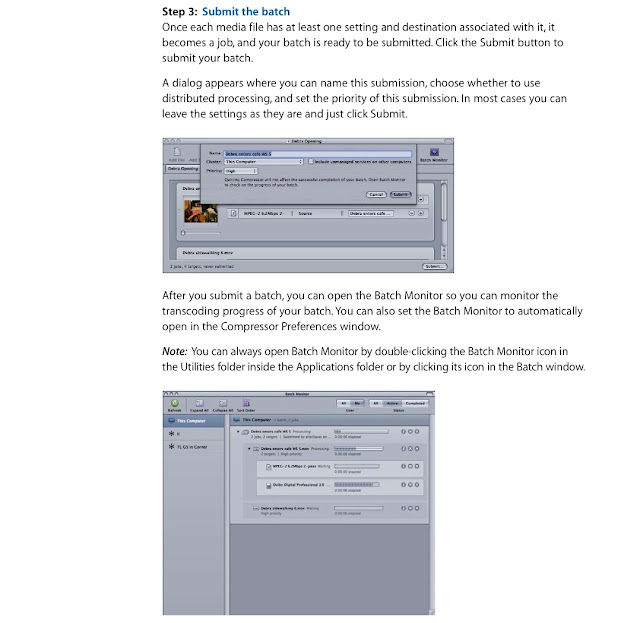
 Once you can see your jobs have been completed in the Batch Monitor you can close it and then close Compressor. You can save it as you quit the program if you wish, but it is not absolutely necessary if it has been done correctly. You can then import the Prores files into FCP following the instructions already outline in a previous tutorial.


No comments:
Post a Comment